Digital humans the art of the digital double
Ever wanted to know how digital doubles are created in the movie industry? This course will give you an insight into how it's done.
#
16
18-10-2011
, 10:50 PM
bullet1968
"A Darkness at Sethanon", a book I aspire to model some of the charcters and scenes
#
17
19-10-2011
, 05:51 AM
Honestly I think that is the last piece I have to add, but I still need to fill in the inside of the clamping part. I keep starting to think about modeling it and I see another thing-a-ma-bob that needs to get added. lol




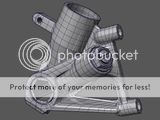

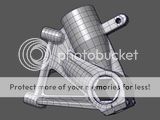
One advantage to using the Boolean method is that I saved the original shapes and so as I keep sticking bits on, and inevitably get the surface all wonky, I can just bring back the original part, subdivide it 3 times, make it live and then just reposition the verts onto the live mesh and bingo no lumps or bumps!
Oops I used the forbidden B-word again. From now on I'll just call it Bob.
"If I have seen further it is by standing on the shoulders of giants." Sir Isaac Newton, 1675
Last edited by ctbram; 19-10-2011 at 06:45 AM.
#
18
19-10-2011
, 07:24 AM

I use booleans a lot. I don't understand the anti attitude some users have to them. As long as you understand that there is tidy up work to be done after and you are prepared to do the work then use them I say.
publicFunction (Chris) - Sent from my iPhone using Tapatalk
Chris (formerly R@nSiD)
When the power of love overcomes the love of power the world will truely know peace - Jimmy Hendrix
 Winner SM VFX Challenge 1
 3rd Place SM SteamPunk Challenge (May 2007)
Last edited by publicFunction; 19-10-2011 at 08:44 AM.
#
19
19-10-2011
, 07:59 AM
#
20
19-10-2011
, 08:19 AM
Im going to get a 'B' swear box put into the forum somehow LOL. Or a possible electric shocking system put in, so everytime you type it a thousand volts shoots thru your keyboard and up you fingers....be warned LOL
Jay
#
21
19-10-2011
, 08:37 AM
It works well. My only gripe is that you have to physically grab each point and jiggle it. It would be a very nice feature if I could pick select verts and just press a hot key to project them down on to the live surface. But it was not that bad. Took about 20 minutes.
The new version added about 19 polygons but that is because I added a edge loop to create proper edge flow.
RETOPOLOGIZED


ORIGINAL...


"If I have seen further it is by standing on the shoulders of giants." Sir Isaac Newton, 1675
Last edited by ctbram; 19-10-2011 at 08:41 AM.
#
22
19-10-2011
, 08:47 AM
Guest
Posts: n/a
Not a great place to start

Looks great though man, especially in keeping the shape together, really hard part to model
#
23
19-10-2011
, 08:56 AM
I can understand why many fear them though as Maya's implementation has a lot of limitations and like NURB's they are scary to folks that come from a poly modeling background.
Clair: Thanks. I am finding that the Boolean method works pretty well but you have to be willing to retopologize a bit to get a proper edge flow. You can rig the deck to some extent by setting up the Boolean objects before joining. Also, by saving the originals it is not hard to delete hole sections of the mesh and then use the original shape (subdivided, and made live) to draw in the proper edge flow.
Jay:

Acid44: Actually I did not plan on modeling the entire bike and I started with that piece because it appeared to be the most difficult to model. If I did decide to do the entire bike everything else would be easy by comparison.

I do plan on modeling of the other complex shaped bits though.
"If I have seen further it is by standing on the shoulders of giants." Sir Isaac Newton, 1675
Last edited by ctbram; 03-12-2011 at 04:11 AM.
#
24
19-10-2011
, 09:35 AM
Guest
Posts: n/a

And yeah, after this the panels would be a waste of time

#
25
19-10-2011
, 10:45 AM
"If I have seen further it is by standing on the shoulders of giants." Sir Isaac Newton, 1675
#
26
19-10-2011
, 10:49 AM
Guest
Posts: n/a
 Would be damn good exercise to do all those little bits in there accurately, and since they're mostly the same you'd have tons of refs
#
27
21-10-2011
, 09:31 PM
Finished with the Brace dojiggermabob thingy and tossed the fender together.
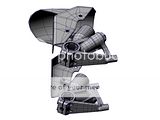
I wanted to play with compositing in PS and AO. So I made a AO, WIRE, and DIF render of each shot and composited them in PS. I did not use FG at all since it just blows out the scene with the all white background.
The renders are without lights. I wanted to examine the affect of the distance value of the MR AO texture node. As you can see from the setup there is a plane that has no visibility in the scene and receives shadows and is not visible in reflection. I believe distance is the max distance from each point can be affected by occlusion. But I am not 100% sure because reading the mental ray documentation is like reading stereo instructions, written in Japanese, and then transcribed to English by a French speaking Chinese person.
Anyway, this is what I have gleaned so far.
The Spread controls size of the hemisphere projecting rays to each point. It has a range from 0.0 to 1.0. Think of a half sphere with a cutting plane. When the value is 1.0 you get the entire hemisphere. As the value gets smaller the cutting plane moves up and reduces the size of the dome, which narrows the cone of rays that affect the occlusion of each point. The documentation says the range is 0.0-1.0 but I have seen people using 1.1 so I am assuming that this might allow the cutting plane to move down below the mid-line of the dome and thus begin to cast rays at an upward angle?
The distance is the maximum distance from each point that rays can affect the occlusion of that point. Think of it as the radius of the hemisphere above each point. I am assuming it is in scene units. I used inches in my scene. With a value of 0 the dome is the size of the entire scene. I tried values of 0, 57 (the distance of the camera from the center of the object), 22 (the diagonal of a cube surround the object in the scene), and 14 (the approximate diameter of a sphere surrounding the objects in the scene).
The first affect I notice is that the greater the distance value the longer the render and the darker and more spread out the shadows. The render times for the same preview section of my scene were as follow...
value time
------ ------------
0............~4 min+
57..........~3 min+
22..........~2 min+
14..........~1:50
7...........~1:50 and some of the parts farthest from the camera had no occlusion
Here is the scene setup....

These are the renders at a distance of 22 and a spread of 1.0....
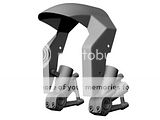
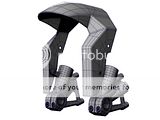

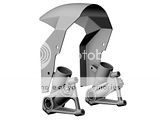
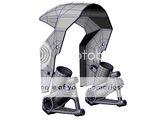
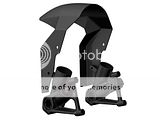
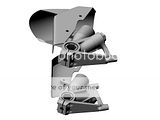

"If I have seen further it is by standing on the shoulders of giants." Sir Isaac Newton, 1675
Last edited by ctbram; 21-10-2011 at 09:34 PM.
#
28
21-10-2011
, 09:54 PM
good findings.....
Spread can be over ridden....we do it all the time in modelling for reviews. Its because some models can have flat surfaces, without the detail where there is nothing to occlude from.....very similar to what dave Rave had on his tank, the body work had no real detail. Hence his whites really burning. The more spread you add the darker the shadows, so thats really choice at the end of the day. Max distance is the distance the rays will bounce to its furthest point, if it is zero then the bounce is actually infinate. So by capping it off with a good value then you should get a good result. Also adding the ground plane really helps with the bounced AO rays, otherwise again the rays are just hitting the object making use of the main creased area and bouncing of the larger spread area int o space giving again burnt whites.
I had a similar prob with an occlusion render on my P51. Because the wings were flat the rays were infinate even with a bit of fall off, but I put in a polyplane above the model so the rays could bounce back. Job done
Higher values do mean longer render times but if you get the balance right then the results are sexy!! Scale is important too...best to model real life objects to real size and take advantage of the power thats on offer this way...a bit like Nparticles, Ncloth etc...work best at proper scales
and as for the documentation on it...I have a bin here for mine LOL. The help is fine generally but really to gain a full understanding of this stuff...working in the right environment really opens the eyes and throws the book out of the window. Thats why Im always happy to pass the knowledge on.
we'll have to do a write up between us mate and post it up
Jay
#
29
21-10-2011
, 10:18 PM
I have been wanting to replace FG with AO for a while now but each time I look at the MR docs my head starts to hurt. No one I work with uses entertainment modeling sw so I have to figure it out on my own along with help for good folks like you.
It is starting to make some sense to me though. The one thing that drives me bonkers with MR is the seeming randomness of everything. How are you supposed to figure out how to set things if there are no rules pr guideline or work flows? That is why a set out to systematically see what the distance value and spread really do and if you can use scene measurements to get you to the right numbers faster rather then just pulling them out your ass so to speak. And this is just one of many variables that all affect each other! It's like trying to solve a multi-variable equation with dozens of inputs! Where do you start? What order do you set things?
I mean what is the point of getting a render to 10 secs if you take 600 hours to figure out the settings and then the next render is completely different and you have to start all over again!
I am now going to scale the model from the current real world size and try the renders again with the distance set to the same proportional distance and see if I get a similar render with the model scaled larger and smaller.
Also I have a ao shader, a wf shader, and then procedurals (blinns, mostly) for the painted renders and what I am calling the diffuse render looks milky because of the all white background but if I tried adjust the levels the whole thing gets darker and so then when I composite the AO layer it gets very dark.
Anyway can you dig that crazy ass part! I counted it and there are like 15 shapes all crammed into a single unified mesh! I thing the topology looks pretty good. I did end up with 3 triangles.
"If I have seen further it is by standing on the shoulders of giants." Sir Isaac Newton, 1675
Last edited by ctbram; 24-10-2011 at 06:15 PM.
#
30
21-10-2011
, 10:43 PM
J
Posting Rules Forum Rules
Similar Threads
ElektroBot Making document - Sait Bakırcı
by saitbakirci in forum SimplyMaya Tutorials replies 0 on 07-06-2012
New Project: District 9 Tessla Riffle
by ctbram in forum Work In Progress replies 82 on 20-11-2010
Particles moving on a surface! Please Help!
by Eurofiles in forum Dynamics & Special Effects replies 4 on 31-07-2006
Particles moving on a surface! Please Help!
by Eurofiles in forum Work In Progress replies 1 on 28-07-2006
I have a problem with Attach, Rebuild, Detach surface.
by ming in forum Maya Basics & Newbie Lounge replies 0 on 19-05-2006
Topics
New tutorial - Create tileable textures from photos. Photoshop to Alchemist to Maya 2
By David
Site News & Announcements
5
Free Courses
Full Courses
VFX News
How computer animation was used 30 years ago to make a Roger Rabbit short
On 2022-07-18 14:30:13
Sneak peek at Houdini 19.5
On 2022-07-18 14:17:59
VFX Breakdown The Man Who Fell To Earth
On 2022-07-15 13:14:36
Resident Evil - Teaser Trailer
On 2022-05-13 13:52:25
New cloud modeling nodes for Bifrost
On 2022-05-02 20:24:13
MPC Showreel 2022
On 2022-04-13 16:02:13


