Complex UV Layout in Maya
Over the last couple of years UV layout in Maya has changed for the better. In this course we're going to be taking a look at some of those changes as we UV map an entire character
# 1 30-03-2007 , 11:04 PM
Registered User
Join Date: Mar 2007
Posts: 32

making simple ring

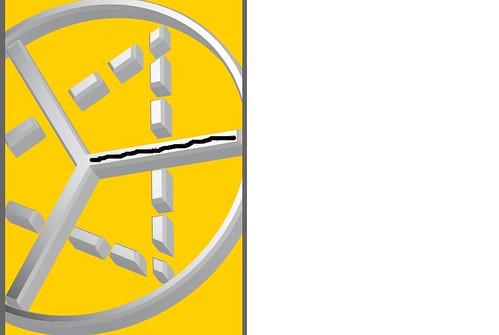
Hi, I'm a newbie. I'm trying to make a ring like the one below with the yellow background.

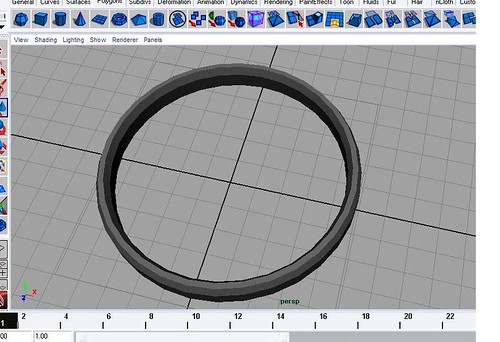
What I did was, I created some NURBS curves circles (6 of them), and lofted them to get the solid and cornered look.

The problem is that it looks blocky, as you can see from the picture below. Is there a way for me to smoothen this out but still have those edges/corners on the top, just like the circle in the image with the yellow background?

Thank you!

user added image
user added image

# 2 31-03-2007 , 02:01 AM
Registered User
Join Date: Jan 2006
Posts: 65
Maybe if you used "Edit NURBS > rebuild surfaces" on all of them and gave them more spans?

# 3 31-03-2007 , 05:50 AM
Registered User
Join Date: Mar 2007
Posts: 32

thanks!

Thanks! That did solve my problem. Actually, I already did that the first time I made a ring, but for some reason, it made the circle weird, like it was a roundish sort of diamond or something. However, I decided to try it again, but now it worked! Raised the U spans to 30, but left the V at 4, rebuilded surface and got a pretty good circle going.

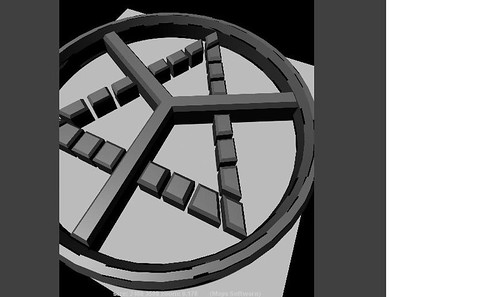
NOW, I have a new problem. When I render it, there are these weird black things going on around the spaces where the curves of the circle used to be before I lofted them. I rendered this at production quality A4 size 300 dpi. Is there a way I can remove these weird black gaps on the circle?

Also, if you notice, the right side of the triangle isn't very smooth. There seems to be some jagged edges. Is there a way to smoothen those out?

Thanks again in advance!

# 4 31-03-2007 , 05:54 AM
Registered User
Join Date: Mar 2007
Posts: 32

thanks!

Thanks! That did solve my problem. Actually, I already did that the first time I made the ring and found it blocky, but for some reason, it made the circle weird, like it was a roundish sort of diamond or something. However, I decided to try it again, and now it worked! Raised the U spans to 30, but left the V at 4, rebuilded surface and got a pretty good circle going.

NOW, I have a new problem. When I render it, there are these weird black things going on around the spaces where the curves of the circle used to be before I lofted them. I rendered this at production quality A4 size 300 dpi. Is there a way I can remove these weird black gaps on the circle?

Also, if you notice, the right side of the triangle isn't very smooth. There seems to be some jagged edges. Is there a way to smoothen those out?

Thanks again in advance!

user added image

# 5 31-03-2007 , 01:38 PM
ctbram's Avatar
Moderator
Join Date: Jan 2004
Location: Michigan, USA
Posts: 2,998
Hi Mami,

When rendering NURBs objects you need to be awhere of render tesselation. All NURB's objects when rendered in Maya are converted into triagular polygons this is called tesselation. The default settings are quite low and so you may need to increase your models render tesselation.

You can do this by selecting the object and the press ctrl-a to open the attributes of the object. There are a number of different ways to adjust the render tesselation. Look for all the tabs the have "tesselation" in them.

You want to keep the tesselation as low as possible while still getting the quality you want from the render as increasing the tesselation will also increase render time.

The simplest thing to do is first check the box that says "display render tesselation" and this will show how your selected object will be converted to a polygonal object for rendering. Under simple tesselation you can choose between different levels low, medium, and high quality.

I find this rarely works for me and I end up turning on "advanced tesselation" and then adjust the "per span" value in u and v.

There is also a check box for "smooth curve" which can be helpful to turn on.

I am sorry I don't really have a workflow to get the best settings. I usually end up just fiddling with the zillion check boxes and sliders until I get something that is to my liking.

Good Luck,
Rick M.


Last edited by ctbram; 31-03-2007 at 01:40 PM.
# 6 31-03-2007 , 04:33 PM
Registered User
Join Date: Mar 2007
Posts: 32
Thank you Rick!! That pretty much solved my problems with those gaps between lofts.

I have a question though about this tessellation...

You mentioned that this tessellation is how the object will be converted to polygons when rendering... does that mean then that technically, all NURBS are turned into polygons when you render them?

Also, where is this Smooth Curve checkbox you mentioned? Though I don't need it, I wanted to see its effect, but could not find it among the attributes. Were you talking about the Edit Curves -> Smooth Curve option at the menu bar?

Or was it Smooth Edge, under the Common Tessellation Options in the Attribute Editor?

Thanks again!:attn:

# 7 01-04-2007 , 01:22 AM
ctbram's Avatar
Moderator
Join Date: Jan 2004
Location: Michigan, USA
Posts: 2,998
Yep, all nurbs are converted to polygonal objects for rendering.

and yep, I ment the "smooth edge" option under the tesselation options. I was to lazy the launch maya and look at the names so I was pulling them from my ... memory (smile).

Albert Alverez of Gnomon Inc. has a free online (non-video) tutorial (available at both the gnomon online site and highend3d as I recall) where he talks about tesselation in some detail. Still he does not really give a workflow. He just describes all the various options.

By the way now that you now about nurbs tesselation I would anticipate your next question might be - What if I have a ton of nurbs in my scene? It would become tedious to have to open each one in the attribute editor and fiddle with its tesselation.

This is true and is one reason I really switched from nurbs to a polygon/subd/poly smooth workflow. However, there is something that can help out with this process.

Look under windows>general editors>attribute spread sheet

This editor will allow you to set the tesselation on all your nurbs objects in a single place.

Hope this helps.

Cheers,
Rick M

# 8 02-04-2007 , 10:38 AM
Registered User
Join Date: Mar 2007
Posts: 32
Thank you very much for the tip! I will surely check out that free tutorial on tessellations.

Posting Rules Forum Rules
You may not post new threads | You may not post replies | You may not post attachments | You may not edit your posts | BB code is On | Smilies are On | [IMG] code is On | HTML code is Off

Similar Threads