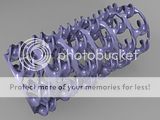
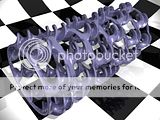
Integrating 3D models with photography
Interested in integrating your 3D work with the real world? This might help
# 1 03-12-2009 , 10:37 AM
ctbram's Avatar
Moderator
Join Date: Jan 2004
Location: Michigan, USA
Posts: 2,998

exploring methods for putting holes in cylinders...

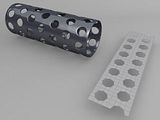
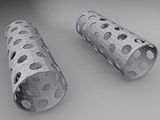
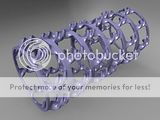
I was just experimenting with some things that tend to be difficult in modeling, one of which was putting holes in a cylinder, and I came up with the following.

There are often times when you would like to put holes into a cylindrical shape, for example a heat guard around a muffler or truck exhaust stacks or perhaps a kind of thingy you see on gun silencers and such.

One way of approaching the problem is to use boolean difference and a bunch of cylinders stuck into the main cylinder. This works but can be messy and time consuming to clean up, so I thought I would try a different method.

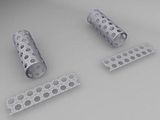
I laid everything out on a poly plane, then used a bend deformer to roll the plane into a cylinder, merged the verts at the top, and finally extruded a couple times for thickness and tight corners.

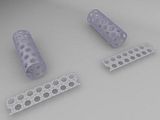
I came up with two geometric patterns.

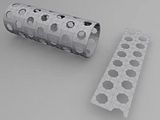
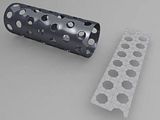
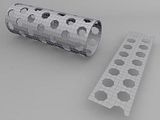
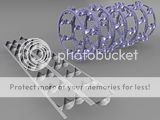
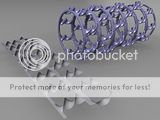
Both start with just the top face of a 8-sided poly cylinder. I extrude in the hole. Then I created two different patterns with 8 unit holes (see the images below). Next I simply used the bend deformer to wrap them into a cylinder using a curvature value of 3.141592 (remember PI). Since the bend is from the center you are making a curvature of PI from both ends so the total curvature is 2PI which is the number of radians in a complete circle.

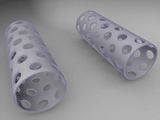
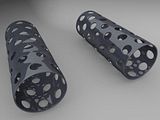
I came up with two patterns one uses fewer polygons but has a subtle wave pattern that I find makes a pleasing form.

The other makes a more uniforn cylindrical surface, but has a slightly denser mesh. To make this pattern, I just started with the octagonal pattern and replaced all the diagonal cuts with horizontal and vertical ones so the edges flow more uniformly along the height and span of the cylinder.

I can see applications where I will be using both styles.

This method has other applications as well. Applying a wrap deforming to a plane of any size you can form a mesh with holes in it around any surface such as a helmet or shoulder pads.

I hope that folks might find this idea useful in their own work.
user added image user added image
user added image user added image user added image


"If I have seen further it is by standing on the shoulders of giants." Sir Isaac Newton, 1675

Last edited by ctbram; 13-12-2009 at 01:13 PM.
# 2 03-12-2009 , 11:17 AM
daverave's Avatar
The thin red line
Join Date: Aug 2009
Location: England
Posts: 4,472
Hi ctbram
Yet again you have made me think how I have done things in the past in lightwave and now in maya. The low poly one looks like you get with say a cheeper manufacture item, the high poly looks like high machined item..........thanks for sharring........dave

PS. may be there should be a forume for "how to"?

# 3 04-12-2009 , 02:33 AM
Registered User
Join Date: May 2009
Posts: 153
sounds very interesting,please make a video/make a tutorial with screenies..........because I'm newbie........

# 4 04-12-2009 , 06:43 AM
ctbram's Avatar
Moderator
Join Date: Jan 2004
Location: Michigan, USA
Posts: 2,998


"If I have seen further it is by standing on the shoulders of giants." Sir Isaac Newton, 1675

Last edited by ctbram; 25-11-2012 at 05:50 PM.
# 5 04-12-2009 , 11:25 AM
daverave's Avatar
The thin red line
Join Date: Aug 2009
Location: England
Posts: 4,472
Nice video, if you had a bigger hole on the same size pipe would you have to increase the geometry of the circle? .....dave

# 6 04-12-2009 , 08:22 PM
daverave's Avatar
The thin red line
Join Date: Aug 2009
Location: England
Posts: 4,472
Had to have a go

Attached Thumbnails
# 7 05-12-2009 , 03:12 AM
ctbram's Avatar
Moderator
Join Date: Jan 2004
Location: Michigan, USA
Posts: 2,998
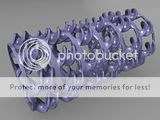
Here is a tutorial that shows how I would create the version that has the smoother surface topology.

In this video I start with a 6-sided polygon and redraw some of the topology so that the edge flow is around and along the height of the cylinder resulting in a smoother surface.

I also show how to make a fast render setup without having to hassle with lights. Finally, as an added bonus I show how to also make a wire frame render using mental rays contour render feature.

Here is what we make:

user added image user added image

and here is the link to the video:

hole in cyl tut2 web - YouTube

There is also a higher resolution quicktime version without audio in the same folder.

NOTES: I rushed a bit so here is a summary of the important bits to know for the contour render setup :

1. You must turn on contour render in 2 places - in the render globals/mental ray/features AND on the shader group for the material on the object itself - mental ray/contour render.

2. also remember to check draw around polygon faces just under where you turn on contour rendering in the RENDER GLOBALS section.

3. I mentioned to set the over sampling to 2 but did not mention that setting the filter type to triangle and the filter support to 2 will also help to make the lines very smooth.

I hope this helps and if people find this kind of stuff useful I will try to make more of them.

Cheers!


"If I have seen further it is by standing on the shoulders of giants." Sir Isaac Newton, 1675

Last edited by ctbram; 25-11-2012 at 05:52 PM.
# 8 05-12-2009 , 11:07 AM
daverave's Avatar
The thin red line
Join Date: Aug 2009
Location: England
Posts: 4,472
Nice video, could you do one for the modo piston Boolean. I understand why you do it this way but I think there are a lot of newbies who do not understand the need to clean up the mesh...........dave

# 9 05-12-2009 , 12:00 PM
ctbram's Avatar
Moderator
Join Date: Jan 2004
Location: Michigan, USA
Posts: 2,998
sure thing Dave. I will do a video on a three piston actuator including how to rig it.


"If I have seen further it is by standing on the shoulders of giants." Sir Isaac Newton, 1675
# 10 05-12-2009 , 08:33 PM
Registered User
Join Date: May 2009
Posts: 153
thanks for the great videos ctbram........

# 11 07-12-2009 , 03:17 PM
ctbram's Avatar
Moderator
Join Date: Jan 2004
Location: Michigan, USA
Posts: 2,998
hmm it appears this method is useful for more then just putting circular holes in a cylinder!

How is this for an abstract shape? Maybe its an ornate medieval candle guard or perhaps the main element of the flux capacitor. (smile).

user added image user added image user added image


"If I have seen further it is by standing on the shoulders of giants." Sir Isaac Newton, 1675

Last edited by ctbram; 13-12-2009 at 01:14 PM.
# 12 08-12-2009 , 02:10 AM
ctbram's Avatar
Moderator
Join Date: Jan 2004
Location: Michigan, USA
Posts: 2,998
Redid the design a little to even out the negative space (holes).

user added image user added image user added image


"If I have seen further it is by standing on the shoulders of giants." Sir Isaac Newton, 1675

Last edited by ctbram; 13-12-2009 at 01:14 PM.
# 13 08-12-2009 , 09:53 AM
ctbram's Avatar
Moderator
Join Date: Jan 2004
Location: Michigan, USA
Posts: 2,998
This is probably boring you all but I am having fun playing with different patterns (smile)...

Started with a Maltese kinda cross shape...

user added image user added image


"If I have seen further it is by standing on the shoulders of giants." Sir Isaac Newton, 1675

Last edited by ctbram; 13-12-2009 at 01:15 PM.
# 14 08-12-2009 , 10:10 AM
Gen's Avatar
Super Moderator
Join Date: Dec 2006
Location: South FL
Posts: 3,522
That last shape is pretty neato (yes I said neato).


- Genny
__________________
::|| My CG Blog ||::
::|| My Maya FAQ ||::
# 15 08-12-2009 , 10:38 AM
ctbram's Avatar
Moderator
Join Date: Jan 2004
Location: Michigan, USA
Posts: 2,998
Applying another bend deformer you can get interesting toroidal shapes...

user added image

...maybe this is the heart of the flux capacitor (smile).


"If I have seen further it is by standing on the shoulders of giants." Sir Isaac Newton, 1675

Last edited by ctbram; 08-12-2009 at 10:47 AM.
Posting Rules Forum Rules
You may not post new threads | You may not post replies | You may not post attachments | You may not edit your posts | BB code is On | Smilies are On | [IMG] code is On | HTML code is Off

Similar Threads