Substance Painter
In this start to finish texturing project within Substance Painter we cover all the techniques you need to texture the robot character.
# 1 06-12-2009 , 01:45 PM
ctbram's Avatar
Moderator
Join Date: Jan 2004
Location: Michigan, USA
Posts: 2,998

modeling and riggin a three piston actuator

Daverave asked if I could make a video on modeling and rigging a three piston actuator.

This tutorial demonstrates how to use the polygon boolean operation to join objects. I also go over how to use aim and point constraints and a locator to rig the actuator so that it behave properly.

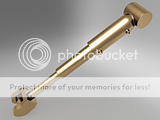
Here is what we create:

user added image

The tutorial was shot in a single take so there are points where I may stutter or have brain freeze so I apologize.

Here is the link to the video:

https://www.screencast.com/t/NGFmNTBhM

========================================

The last section on rigging gets a little ahead of me and I have to rush the narration so here are some points that I could not fit in the video.

1. For aim constraints you need an up vector that maintains its orientation relative to the actuator. For this we create a locator and in an actual model that locator would be parented at the top of the hierarchy containing all the actuators so that it always maintains the same relative orientation to the actuators as the entire hierarchy rotates.

In this example I just parented it to the actuator group itself.

A brief description of why you need the up vector is this. Consider what would happen if we use the world Y axis as up. This would work as long as the pistons never rotate beyond 180 degrees. As soon as one of the ends goes beyond 180 degrees +Y would then be DOWN relative to the pistons and they would fly apart.

If you parent a locater to the hierarchy that contains the pistons they will always be in the same relative orientation so UP will always be UP. As Albert would say - It's a relativity thing!

For this system we have 3 aim constraints. When setting constraints you pick pairs of objects. The LAST object picked is the one that is going to get the constraint.

1. pick the bottom piston, then the top piston, pick aim constraint make sure the locator is named and set as the up vector. Set the direction vector to [0 -1 0]

2. pick the top piston, then the bottom piston, pick aim constraint with the direction vector to [0 1 0]. The up vector will be remembered so you don't have to enter the name again.

3. pick the top piston, then the middle piston, pick aim contraint with the direction vector to [0 1 0]

This keeps all the pistons pointing the right way now to keep the middle piston alway between the top and bottom ones set two point constraints on it...

1. pick the top piston, pick the middle piston, pick point constraint (the middle piston pivot will pop to the top piston pivot.

2. pick the bottom piston, pick the middle piston, pick point constraint and the middle piston will pop midway between the top and bottom pistons pivot points.

and you are done.

This system works nicely because the parts are aligned straight up and down. If that were not true then there would be one additional step.

After setting the constraint, the up vector, and the direction vector, the parts will not be aligned if the up directions of the part and the up vectors up direction are not aligned. To correct this you would go to the channel box and adjust the x,y,z rotation offsets until everything comes into alignment. This may seem confusing, but in general the up vector will be parented in the top of the hierarchy and will most like start out matching world +Y but all the pistons and objects with aim constraints in a real world model will not be straight up and down. That is okay, don't panic, just follow the the steps above and after you apply the constraint adjust the offsets in the channel box to get things properly aligned.

Cheers!

Additonal Credits:

The main idea for this project came from the work done by Andrew Brown, who works for Luxology - the maker of Modo. Andrew is a wonderful teacher and orator. I was inspired by his works and the clarity of his presentations. Although the concepts presented here are the same, the methods used in Maya are slightly different, so I hope Andrew does not mind me re-encapsulating some of his work here in the hopes of aiding Maya users.

"If I have seen further it is by standing on the shoulders of giants." Sir Isaac Newton, 1675

Last edited by ctbram; 06-12-2009 at 09:23 PM.
# 2 06-12-2009 , 01:48 PM
ctbram's Avatar
Moderator
Join Date: Jan 2004
Location: Michigan, USA
Posts: 2,998
I was on a roll so I made an additional video to add the hydraulic connectors to the side of the actuator.

Here is what we model:

user added image

Here is the video:

https://www.screencast.com/t/N2M1YmY2


"If I have seen further it is by standing on the shoulders of giants." Sir Isaac Newton, 1675
# 3 06-12-2009 , 06:37 PM
daverave's Avatar
The thin red line
Join Date: Aug 2009
Location: England
Posts: 4,472
Hi ctbram
Just watched your first video witch was great, so meny times I have watch hour long tutorial that did not teach half as much...........dave


what fish do you catch and ice fishing do you have to make a hole in the ice lol

# 4 06-12-2009 , 07:51 PM
ctbram's Avatar
Moderator
Join Date: Jan 2004
Location: Michigan, USA
Posts: 2,998
Thanks Dave.

This is the first time I have used camtasia and I am just making the narration up off the top my head, so I hope they are not too bad. I really did everything in a single take so they are not as polished as they could be. I am hoping the video quality is high enough that people can freeze frame to see the menu options I am making.

One thing I noticed after watching these myself is I don't really explain the snapping methods I use, like curve and grid snap. They are hard to show in a video because you hold a key down like c (curve) and x (grid) then middle mouse gesture over where you want to grid snap the elements too. Then there are additional options like "keep spacing" that you set up from the move options. I did try to say when I was snapping things though.

Here in Michigan we fish mainly for perch, walleye, pike, and bass and then there are pan fish like bluegill and sunfish. I never really enjoyed ice fishing (It's cold) and I fell through the ice once as a kid. Basically, you bundle up, hike out on to a frozen lake, use an auger to drill a hole and use a rig called a tip up that has a little spring loaded flag that pops up when you get a bite. My brother likes ice fishing more then me, but I think that is because he brings a case of beer with him and gets stinking drunk then stops at McDonald's on the way home and buys McFish sandwich. (lol).

Let me know if there is anything I can do to improve the videos. If people find them useful I will try to make more of them and improve the quality. I was going to do some simple ones to try and add to the free stuff on the site to help people just learning maya.

I have learned a great deal from this site and hope that I am adding some useful stuff in return.


"If I have seen further it is by standing on the shoulders of giants." Sir Isaac Newton, 1675

Last edited by ctbram; 06-12-2009 at 08:43 PM.
# 5 07-12-2009 , 10:30 AM
daverave's Avatar
The thin red line
Join Date: Aug 2009
Location: England
Posts: 4,472
Hi ctbram
I think you video was very good but I do wish others would comment, If I get time I will model your piston just following your tutorial and let you know how I get on.

I used to fish in all weather but as I get older I think twice about fishing in the snow but in saying that I like your brothers idea of fishing...........dave

Posting Rules Forum Rules
You may not post new threads | You may not post replies | You may not post attachments | You may not edit your posts | BB code is On | Smilies are On | [IMG] code is On | HTML code is Off