Join Date: Aug 2011
Join Date: May 2006
I am not bothered with you jumping on this thread at all matey as we are both working together on this now and is all cool with me. The only + to starting your own thread is people will be able to direct crit at you specifically. Nothing to say from my end though and think the proportions are looking spot on and that this method is gonna speed up our workflow tremendously.
Also I would not worry about posting work on here that is not specific to Maya. I know Kurt for one has threads which have a lot of zbrush work. He's base meshes are made in Maya but all the progress is in zbrush, people use the site as you would expect to answer questions and help improve the final with feedback and crits.
Damn a piece of me died every time we went out to eat when they lit one of those damn candles, and that music ahhhhhhhhhhhhh.
Also Njkc, cheers for your kind words and I totally agree, I will try to add a lot more muck to the textures on the characters as well as vehicles but what is there is mainly a final base which can be tweaked to give variation.
I will try to get back to this soon, have just been busy with other work at the moment and hope to be back on this next week.
Cheers guys,
Leon
cheers bullet
bullet1968
"A Darkness at Sethanon", a book I aspire to model some of the charcters and scenes
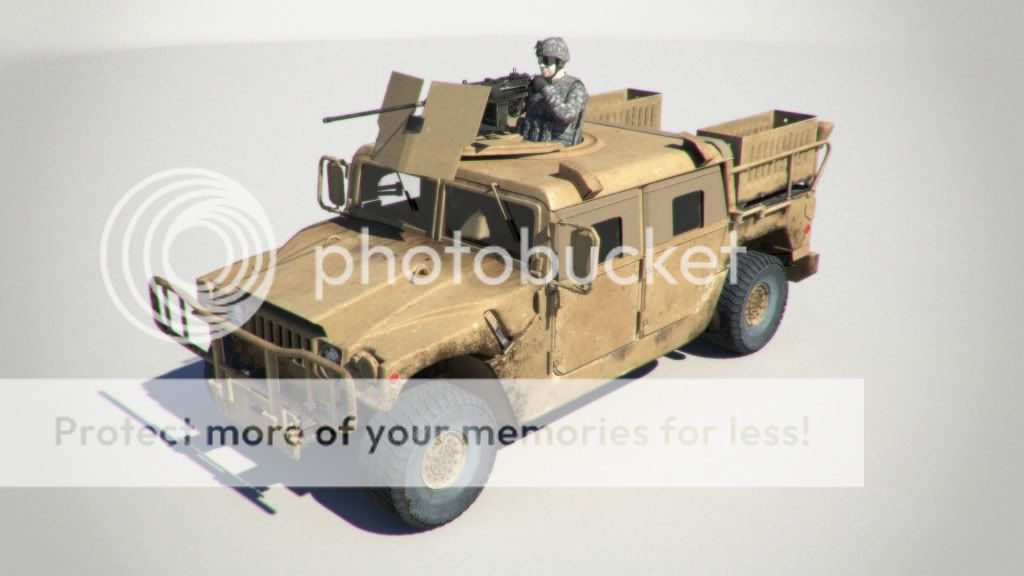
Sweet holy hell.Been busy as have loads of models I need to create at the moment so my wolf project is gonna have to go on hold for a couple of weeks. Thought I would share one of the models that I am currently working on though.
Are you kidding me? This is outrageous. Well done!
Does everyone know how to do this lighting but me? How are you doing this gray-light set up? I am definitely checking out the tire tutorial.
I feel like such the newb I am. Great great stuff man.
Thanks,
Travis
Join Date: May 2006
to get the renders I use mental ray and a physical sun set up.
1st goto window>settings and prefs>plug in manager now make sure Mayatomr.mll is checked. Now you need to open your render settings and make sure you are using mental ray. Next goto the indirect lighting tab in your render settings and hit the create option for physical sun and sky. You can now goto the quality tab and select production for a decent render, next in the features tab you will need to make sure final gather is checked. Only other option worth changing in here is under the common tab> enable color management.
This should now work fine but it is a good idea to adjust the gamma as the image can be pretty blown out. To do this you will need to open the hypershade and goto the utilities tab and select the mia exposure node. I tend to set the gamma to 1.333 but see what works for you.
If you have any questions or probs feel free to email me leondannylabyk@hotmail.com
Best of luck and hope this answers your question though.
Wow. Thank you so much. I will (to all). And thanks for the invitation of communication. i may actually do that just to bend your ear a bit on the software and the biz. Thanks again!!!Cheers Travis,
to get the renders I use mental ray and a physical sun set up.
1st goto window>settings and prefs>plug in manager now make sure Mayatomr.mll is checked. Now you need to open your render settings and make sure you are using mental ray. Next goto the indirect lighting tab in your render settings and hit the create option for physical sun and sky. You can now goto the quality tab and select production for a decent render, next in the features tab you will need to make sure final gather is checked. Only other option worth changing in here is under the common tab> enable color management.
This should now work fine but it is a good idea to adjust the gamma as the image can be pretty blown out. To do this you will need to open the hypershade and goto the utilities tab and select the mia exposure node. I tend to set the gamma to 1.333 but see what works for you.
If you have any questions or probs feel free to email me leondannylabyk@hotmail.com
Best of luck and hope this answers your question though.
Join Date: May 2006
Not really much in the way of progress as I have just been making sure everything is to scale with regard to chairs, controls etc. The vehicles and weapons are pretty much bang on but needed to make some minor adjustments to the seats and other bits and pieces. Character is fully rigged and ready to go and so I will try and get some decent animation together soon.
Here is a render with a lone soldier in the chinook.

Join Date: May 2006
Cheers
Join Date: May 2006


Last edited by leonlabyk; 19-10-2011 at 11:40 AM.
Why do you set it to 1.333, shouldn't it be set to 0.454?I tend to set the gamma to 1.333 but see what works for you.
Join Date: May 2006


Join Date: May 2006
Yeah just a blinn using the contour option.
Join Date: May 2006
Untitled on Vimeo


