Maya 2020 fundamentals - modelling the real world
Get halfway through a model and find it's an unworkable mess? Can't add edge loops where you need them? Can't subdivide a mesh properly? If any of this sounds familiar check this course out.
#
31
05-03-2010
, 09:11 AM
When you perform a boolean and get an unexpected result then simply undo the boolean and reverse the normals on ONE of the surfaces and then reapply the boolean. If you again get unexpected results, undo once again and then flip the normals on the other object and reapply the boolean. One of the three will work as the normals only have three possible combinations - both out, one out and one in, and both in.
It also helps to uncheck lighting>show two sided lighting this will give you visual feedback that the normals are facing outward.
Oh just a note on the .ma file. I am using Maya 2010 if you are using a different version do the following:
1. select open>option box
2. under general options you will see a check box that reads "ignore version". check it!
3. now open the file and it will open.
Hope that helps.
-ctbram
ps- when you redo the nose blister you might want to see what happends if you split the sphere longitudinally through the poles. If you split at the equator as I did you will get some pinching at the pole.
pps - For maya 8.5 ... Ignore Version is in File -> Open Scene options. ... Along the top line Maya 8.5 appears four times ...
"If I have seen further it is by standing on the shoulders of giants." Sir Isaac Newton, 1675
Last edited by ctbram; 05-03-2010 at 10:03 AM.
#
32
05-03-2010
, 09:14 AM
Dont know if you mean to do the lac with the grandslam bomb, heres a link to a slightly more detail drawing...dave
https://www.the-blueprints.com/bluepr...%28england%29/
#
33
05-03-2010
, 09:30 AM
jeez your good to me.
bullet1968
"A Darkness at Sethanon", a book I aspire to model some of the charcters and scenes
#
34
05-03-2010
, 09:32 AM
bullet1968
"A Darkness at Sethanon", a book I aspire to model some of the charcters and scenes
#
35
05-03-2010
, 01:28 PM
lanc_guns
I got bored/stuck on the plane so I am going for the guns. How the hell do I combine/delete the heat sinks?? I can do it 1 by 1 but there has to be a better way. I tried grouping the heatsink bubbles but it will only do 2 poly's at a time, tried diff, inter etc?? Am I going about it the wrong way??
Cheers Ant
bullet1968
"A Darkness at Sethanon", a book I aspire to model some of the charcters and scenes
#
36
05-03-2010
, 02:05 PM
#
37
05-03-2010
, 02:13 PM
happens every time (same as my Survey learning). I combined the spheres as one mesh then did a diff, it worked, sorry my stupidity guys. L = learner, I have been on it for 2 hours now, tried everything then realised at the last to combine then diff. Arrrrrrrrrrrrrrrrrrrrrrrrrrrrrr
Ok here it is after some soul searching and mind destroying learning!!!!
bullet1968
"A Darkness at Sethanon", a book I aspire to model some of the charcters and scenes
Last edited by bullet1968; 05-03-2010 at 02:26 PM.
#
38
05-03-2010
, 02:27 PM
bullet1968
"A Darkness at Sethanon", a book I aspire to model some of the charcters and scenes
#
39
05-03-2010
, 02:43 PM
...and you figured it out when using that method for booleaning out multiple holes you combine all the cutting objects into a single object, then apply the boolean. If you check out the revolver cylinder video I posted you can see that is how I booleaned the inner holes and the outer indents in the cylinder.
You just need to be careful when creating your initial geometry for both the cut and cutting objects so as to make the cleanup after the boolean as easy as possible.
Always shoot for all quads while maintaining your desired shape after cleaning things up. It's okay if you get a few triangles (I don't stress those as much as others do, but that being said, also try to minimize or eliminate them).
"If I have seen further it is by standing on the shoulders of giants." Sir Isaac Newton, 1675
Last edited by ctbram; 05-03-2010 at 02:50 PM.
#
40
05-03-2010
, 03:15 PM
hmmmmm quads are weird for a Surveyor BUT I AM listening. I figured the multiple cuts through sheer trial and error and LOTS of thinking man. Its how I learn, probably not the best way in some eyes but that is how I became a good Surveyor, the hard way.
Again thanks a lot mate, all of you have been ace man!!!
bullet1968
"A Darkness at Sethanon", a book I aspire to model some of the charcters and scenes
#
41
05-03-2010
, 04:48 PM
I want to go through one possible thought process when using the boolean approach.
Hopefully it will prove to be helpful.
"If I have seen further it is by standing on the shoulders of giants." Sir Isaac Newton, 1675
#
42
05-03-2010
, 09:16 PM
https://www.screencast.com/t/NzI3MjQ5N
Here is the link to the holes in cylinder thread...
https://srv01.simply3dworld.com/showt...868#post301868
Here is the piece modeled....

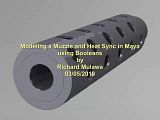
I threw it together really fast and I noticed I say "scale" a couple times when it should be clear I meant to say "extrude".
"If I have seen further it is by standing on the shoulders of giants." Sir Isaac Newton, 1675
Last edited by ctbram; 06-03-2010 at 02:44 AM.
#
43
06-03-2010
, 01:19 AM
That was really cool, I hope to be as good as that not too far away (wishful thinking). I realise what you mean about the quads. I will do one with your method right now.
Cheers bullet
bullet1968
"A Darkness at Sethanon", a book I aspire to model some of the charcters and scenes
#
44
06-03-2010
, 06:53 AM
revolver tutorial
if you get time and can link to it, can you have a look and tell me what Im doing wrong please??
https://dl.dropbox.com/u/4090628/gun_barrel_tutorial.wmv
I seem to extrude ok BUT the object doesnt appear to be planar to the original?? It has a very small lip on the outer edge of the hole. I have all settings in extrude set to 0 except for division.
Cheers bullet
bullet1968
"A Darkness at Sethanon", a book I aspire to model some of the charcters and scenes
#
45
06-03-2010
, 07:09 AM
This extrude operation will create a small inset (off plane lip) on that small border but it should be almost inperceptable in the final.
What I did notice is that you merged the border edge verts around the holes and you don't want to do that.
The purpose of the small border of faces around the holes is to get three edges close together to keep the edges around the holes tight when you add thickness in later steps.
As you move inward to the hole that is an edge, then another edge right at the hole, then after adding some thickness you move around the corner and there will be another edge. The closer the three edges that form the corner are the sharper the corner of the hole will be. So you don't want to merge that border away.
If I managed to confuse you just drop me another message and I will give you a hand.
Cheers

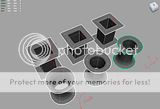
In the above you can see how maya smooths between 3 edges. The closer the 3 edges the tighter the corner.
----------------------------------\
We add the border around the holes to give us two of the three edges needed to form the corner around the hole (the third edge is added when we add thickness).
About the border edge created around the hole to control the tightness of the corner. There are two ways to do it using extrude. There will be a small inset as a result of the curvature in the surface regardless of which method is used.
1. Scale inward

If you use scale uniform inward all the edges will have an inset below the main surface.
2. Offset inward

If you use Offset inward notice the vertical point stay planar but the side edges will be off plane and have a small inward taper.
So both methods will produce a small lip, but if the border edge is very small it will not be to noticeable.
I prefer to use offset as for small insets it goes off plane the least.
For large insets I find scale is better as everything tends to go in or out the same amount and so you can manually adjust by just pulling or pushing the face that was extruded a tiny amount to try and get things as planer as possible.
ps - if you want to keep the border edge faces all planar you can cut the border edge around the hole manually using split polygon. You'd just have to give yourself a bit more room when you boolean the hole around the out side. But if the border edge is as close as it is in this example the small inset from the main surface should not present a problem.
It all depends on how perfect you want things to be. I came from an automotive drafting background and I used to spend lots of time trying to make everything perfect but soon realized maya and programs of its ilk were designed for artists not draftsmen and as such is more of a artsy fartsy if it looks good enough then well...it's good enough kinda philosophy.
So I drank the cool aid and don't swet the details as much as I did when I first started modeling with Maya. (smile).
"If I have seen further it is by standing on the shoulders of giants." Sir Isaac Newton, 1675
Last edited by ctbram; 06-03-2010 at 01:15 PM.
Posting Rules Forum Rules
Similar Threads
Character Model Problem
by MissKelly in forum Maya Basics & Newbie Lounge replies 1 on 06-07-2013
All steps to get a good model
by Skalman in forum Maya Modeling replies 2 on 15-05-2013
ElektroBot Making document - Sait Bakırcı
by saitbakirci in forum SimplyMaya Tutorials replies 0 on 07-06-2012
Quadrangulating a warcraft model ?
by goggles in forum Maya Modeling replies 2 on 24-05-2012
Splitting up a model
by Velusion in forum Maya Modeling replies 4 on 09-11-2004
Topics
New tutorial - Create tileable textures from photos. Photoshop to Alchemist to Maya 2
By David
Site News & Announcements
5
Free Courses
Full Courses
VFX News
How computer animation was used 30 years ago to make a Roger Rabbit short
On 2022-07-18 14:30:13
Sneak peek at Houdini 19.5
On 2022-07-18 14:17:59
VFX Breakdown The Man Who Fell To Earth
On 2022-07-15 13:14:36
Resident Evil - Teaser Trailer
On 2022-05-13 13:52:25
New cloud modeling nodes for Bifrost
On 2022-05-02 20:24:13
MPC Showreel 2022
On 2022-04-13 16:02:13


