Integrating 3D models with photography
Interested in integrating your 3D work with the real world? This might help
# 1 18-11-2011 , 09:50 PM
ctbram's Avatar
Moderator
Join Date: Jan 2004
Location: Michigan, USA
Posts: 2,998

50 cal browning machine gun

Taking a break from the f8f landing gear and working on an asset for a D9R military bulldozer I am working on. I'll post wips on that later.

This is a very accurate 50 cal browning machine gun that will be an asset for that model.

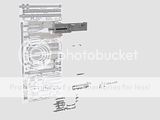
I included an image of the reference blueprints to show how I am building the individual components from the blue prints and assembling them to make a very accurate model of the gun.

I am a good ways done. I have the barrel done it's just not shown. I have to make the barrel heat sync, sights, handles, and other little bits and bobs.


user added image user added image user added image user added image

user added image user added image user added image

Attached Thumbnails

"If I have seen further it is by standing on the shoulders of giants." Sir Isaac Newton, 1675

Last edited by ctbram; 12-03-2012 at 03:54 AM.
# 2 18-11-2011 , 10:14 PM
daverave's Avatar
The thin red line
Join Date: Aug 2009
Location: England
Posts: 4,472
That s looking good Rick, you are going a little more detailed than my one...........dave

Edit:after finding as much about refs as I could I felt that I could reload one and fire without actualy touching one


Avatar Challenge Winner 2010

Last edited by daverave; 18-11-2011 at 10:18 PM.
# 3 18-11-2011 , 11:22 PM
bullet1968's Avatar
Lifetime Member
Join Date: Feb 2010
Location: Australia
Posts: 4,255
wow nice Rick.....as for the D9 hope you have some good refs...I have been trying to get manuals on dozers and loaders etc for ages.

cheers bullet


bullet1968

"A Darkness at Sethanon", a book I aspire to model some of the charcters and scenes
# 4 19-11-2011 , 06:34 AM
PixalZA's Avatar
Lifetime Member
Join Date: May 2011
Location: Riyadh, Saudi Arabia
Posts: 525
That is looking really good ... pixal

# 5 19-11-2011 , 10:47 PM
David's Avatar
SM Tea Boy
Join Date: Apr 2002
Location: Prague
Posts: 3,228
Very nice mate, as always love the attention to detail.

Dave user added image


From a readers' Q and A column in TV GUIDE: "If we get involved in a nuclear war, would the electromagnetic pulses from exploding bombs damage my videotapes?"
# 6 12-03-2012 , 12:51 AM
ctbram's Avatar
Moderator
Join Date: Jan 2004
Location: Michigan, USA
Posts: 2,998
I had a little time so I did the heat exchanger bit and the barrel. I will prolly go back and tweak it later as I am still not happy with it. It's a bugger of a shape to unify.

user added image user added image user added image user added image

user added image user added image

All that is left are the sites and the trigger and handle assembly and the tripod mount.


"If I have seen further it is by standing on the shoulders of giants." Sir Isaac Newton, 1675

Last edited by ctbram; 12-03-2012 at 03:28 PM.
# 7 12-03-2012 , 07:19 AM
djwaterman's Avatar
Registered User
Join Date: Nov 2011
Location: Sydney
Posts: 196
Hey I really like the work and detail, and I really like the renders, what is the basic set up for you GI, occlusion or lighting?

# 8 12-03-2012 , 08:24 AM
daverave's Avatar
The thin red line
Join Date: Aug 2009
Location: England
Posts: 4,472
Looking good Rick any wires............dave


Avatar Challenge Winner 2010
# 9 12-03-2012 , 12:54 PM
ctbram's Avatar
Moderator
Join Date: Jan 2004
Location: Michigan, USA
Posts: 2,998
@dave I'll post the wires in as soon as I get through my morning mail. I cheated a little on the heat sync and the part with the holes is currently trimmed nurbs with poly parts one each end. I'll split it apart so you can see. It was easiest to put perfect holes with nice rounds by projecting a circle from the top and sides. I do intend to redo it in polygons and I can use the nurbs model as a guide.

@dj It's pretty basic settings, I go for production or production fine trace, final gather, no lights, med light grey env background color, MR amb occ node piped to a surface shader, 128 samples, and I measure the max distance or just guestimate it that light rays would have to travel (in this case the max width of the heat sync thingy) and double it for distance, and then play with the spread from .8 to 1.6 until I get an acceptable look and 85mm portraiture lens.


"If I have seen further it is by standing on the shoulders of giants." Sir Isaac Newton, 1675

Last edited by ctbram; 13-03-2012 at 12:08 AM.
# 10 12-03-2012 , 01:01 PM
ctbram's Avatar
Moderator
Join Date: Jan 2004
Location: Michigan, USA
Posts: 2,998
Here are the wires Dave. Contour render apparently only works with polygons so no isolines get diplayed for the NURB's part. I went with 16x16 nurbs surfaces and 16x2 for the lofts and rounds. Mesh density is important when applying rounds to the trimmed surfaces or you will get visible seams.

I went with NURB's just because it was fast and easy. But in the end I will want the model to be all polys and unified. With this as a guide to model over it will be easier. For now though it works.

user added image user added image

The NURB's part consists of an inner and outer tube that has the holes trimmed, a loft from the outer to inner tube for each hole, and a round (.04) on the top of each hole. So there are two patches for each hole and two trimmed surfaces for the inner and outer tube.


"If I have seen further it is by standing on the shoulders of giants." Sir Isaac Newton, 1675

Last edited by ctbram; 12-03-2012 at 03:52 PM.
# 11 12-03-2012 , 05:38 PM
Mayaniac's Avatar
As Zbrushiac sounds stupid!
Join Date: Nov 2007
Location: Derby
Posts: 1,241
Looks really good. Very well modeled, as expected. It's cool to see nurbs being incorporated into your model. I know a lot of people tend to shy away from using them, but you can really get some nice results.


www.stevenegan-cgi.com

"Your weapons are no match for ours! People of Mars, surrender!"
"Um, this isn't Mars. This is Earth."
"Earth? Earth-with-nuclear-weapons Earth?"
"Yes."
[long pause] "Friend!!"
# 12 12-03-2012 , 08:14 PM
ctbram's Avatar
Moderator
Join Date: Jan 2004
Location: Michigan, USA
Posts: 2,998
Thanks Mayaniac,

The tube itself is actually quite easy to model in poly's. I actually had most of the entire surface done in NURB's but I was converting it all to poly's and that was the last piece I had to do.

I might show the entire part in it's NURB's form. It is quite nice actually and because I can apply rounds to all the intersections it looks like a single molded part. I only modeled it as NURB's to demonstrate how easy it is to make complex surfaces in nurbs without have to worry about routing edges, but figured no one is really interested in NURB's so I was just going to quietly make the poly surface.

However, as the Scooby Doo villain would say...I would have gotten away with it too, but Dave asked to see the wires!


"If I have seen further it is by standing on the shoulders of giants." Sir Isaac Newton, 1675

Last edited by ctbram; 12-03-2012 at 08:40 PM.
# 13 17-03-2012 , 09:28 PM
ctbram's Avatar
Moderator
Join Date: Jan 2004
Location: Michigan, USA
Posts: 2,998
Here are a few updates, I had a little time this morning and decided to fix the barrel support area with the holes. I did not pay attention to the references (and there are also a few variations on that part) and the version I liked has three holes on the side and four holes above and below and the pattern is repeated on the other side for a total of 22 holes.

That portion of the model is still NURBs as it is easiest to construct that way. The other components are polys and some of those bits I built first using NURBs. The back portion that attaches to the receiver, for instance, I built as NURBs patches, then projected the holes area the is cut out. Then converted the patches back to polys and simple welded the verts and added some control edges.

user added image user added image user added image

user added image user added image user added image

user added image user added image user added image


"If I have seen further it is by standing on the shoulders of giants." Sir Isaac Newton, 1675

Last edited by ctbram; 18-03-2012 at 04:15 PM.
# 14 17-03-2012 , 09:32 PM
daverave's Avatar
The thin red line
Join Date: Aug 2009
Location: England
Posts: 4,472
Looking good Rick seeing yours just reminded me to put the barrel handle back on mineuser added image.........dave


Avatar Challenge Winner 2010
# 15 17-03-2012 , 09:37 PM
ctbram's Avatar
Moderator
Join Date: Jan 2004
Location: Michigan, USA
Posts: 2,998
Thanks Dave, the references I had for that handle were kind of vague so I had to wing it a little bit. It's just a circle extruded along a curve for the wire and some cylinders and a couple torus's (tori?). But from a mile a way and going 50 mph it'll look just fine. lol

I keep putting off the handles and trigger area because my references are a bit sketchy, especially for the trigger area and I am trying to make it as accurate as I can.

But anyway all that should be left is:

- trigger area gizmos
- handle asm
- rear site asm
- tripod
- a couple of safety wires (small detail)


"If I have seen further it is by standing on the shoulders of giants." Sir Isaac Newton, 1675

Last edited by ctbram; 17-03-2012 at 09:42 PM.
Posting Rules Forum Rules
You may not post new threads | You may not post replies | You may not post attachments | You may not edit your posts | BB code is On | Smilies are On | [IMG] code is On | HTML code is Off

Similar Threads