Integrating 3D models with photography
Interested in integrating your 3D work with the real world? This might help
# 16 26-08-2011 , 05:10 PM
ipatch's Avatar
Subscriber
Join Date: Aug 2011
Posts: 24

Personally, I would start with the cylinders. Delete all but the top faces. Then cut the center one into quarters and just build 1/4 of the caster base by combining the quarter face and the whole face and then use a combination of bridge and append to polygon and extrude and target weld verts to fill in the gap and go from there...

user added image

From there it is just a couple extrudes to get to here ...

user added image

How did you cut the polygon cylinder cap/base, I tried using the "Interactive Split Tool" and the "Insert Edge Loop Tool" and neither of these would allow me to add edges to split the middle cylinder into a quater.

The "Cut Faces Tool" under the "Edit Mesh" menu seemed to cut the base into quaters.


cheers
-C

Last edited by ipatch; 26-08-2011 at 05:18 PM.
# 17 26-08-2011 , 06:16 PM
ipatch's Avatar
Subscriber
Join Date: Aug 2011
Posts: 24


cheers
-C
# 18 26-08-2011 , 11:38 PM
ctbram's Avatar
Moderator
Join Date: Jan 2004
Location: Michigan, USA
Posts: 2,998
the split poly tool should have worked that is how I cut it into quarters. But the cut faces tool will work it's just you may not cut right through the verts.


"If I have seen further it is by standing on the shoulders of giants." Sir Isaac Newton, 1675

Last edited by ctbram; 28-08-2011 at 02:01 PM.
# 19 27-08-2011 , 03:02 AM
ipatch's Avatar
Subscriber
Join Date: Aug 2011
Posts: 24

the slit poly tool should have worked that is how I cut it into quarters. But the cut faces tool will work it's jut you may not cut right through the verts.

Did you see the post I started on my website? I am stuck where you say you use the "insert edge loop tool"?

Also did you start with a cylinder polygonal primitive then remove the excess faces, and subdivisions as stated in my post.


cheers
-C
# 20 27-08-2011 , 04:01 AM
ctbram's Avatar
Moderator
Join Date: Jan 2004
Location: Michigan, USA
Posts: 2,998
After bridging the three edges. Then pick the two edges of the quarter circle and extrude them out. Then I straightened the edges and inserted som edge loops then connected them up. I'll try to put something together for you to help explain it better


"If I have seen further it is by standing on the shoulders of giants." Sir Isaac Newton, 1675
# 21 27-08-2011 , 03:24 PM
David's Avatar
SM Tea Boy
Join Date: Apr 2002
Location: Prague
Posts: 3,228


From a readers' Q and A column in TV GUIDE: "If we get involved in a nuclear war, would the electromagnetic pulses from exploding bombs damage my videotapes?"
# 22 28-08-2011 , 01:16 AM
ipatch's Avatar
Subscriber
Join Date: Aug 2011
Posts: 24

After bridging the three edges. Then pick the two edges of the quarter circle and extrude them out. Then I straightened the edges and inserted som edge loops then connected them up. I'll try to put something together for you to help explain it better

didn't realize you were the guy who modeled the jerry can. ...props, thanks for the video explaination too, super cool.

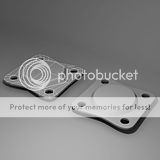
I just finished watching the video, and this is what I completed.

user added image

For some reason the middle part separated from me when I extruded it, and I had to go in use the merge edge tool. So the base is flat, and does not have the curvature on the under side. I want to blame my video card for this problem, but it definitely looks good.


cheers
-C

Last edited by ipatch; 28-08-2011 at 05:00 AM.
# 23 28-08-2011 , 09:15 AM
ctbram's Avatar
Moderator
Join Date: Jan 2004
Location: Michigan, USA
Posts: 2,998
it's closer but I can see, even without a wireframe, that you are missing support edges around the circle areas and they are not holding their shape. Also, I am guessing you either thickened in the + direction or translated + z. Watch the section of the video where I add the inner support edges and add thickness. I show what happens when I tried to thicken in the + direction and it looks just like your render.

Don't be discouraged, you are very close.

I will be making another video to show you how I would model the remaining parts soon. Here is version 2 of the completed caster that will be in the next video.

I wanted the bearings to be more visible. No sense burning all the polygons for them (even unsmoothed) and barely be able to see them (smile).

user added image user added image user added image user added image


"If I have seen further it is by standing on the shoulders of giants." Sir Isaac Newton, 1675

Last edited by ctbram; 28-08-2011 at 09:25 AM.
# 24 28-08-2011 , 10:17 AM
honestdom's Avatar
The Nurb Herd
Join Date: Oct 2007
Location: London
Posts: 2,381
Hey, i watched your video. What is strange to me is that its all quite high polygon. I guess thats fine if you are only modeling this. But then the wheel has less polys than the bolt thats holding it in. Also you talk about keeping things quads, but you end up with a 20 sided polygon in the middle circle bit. I don't think its a problem tho.

# 25 28-08-2011 , 12:28 PM
ctbram's Avatar
Moderator
Join Date: Jan 2004
Location: Michigan, USA
Posts: 2,998

Hey, i watched your video. What is strange to me is that its all quite high polygon. I guess thats fine if you are only modeling this.

The point of the video was the modeling technique. I made no attempt to optimize the poly count. I used the default primitives (cylinder (20) and sphere (20x20)). I could have reduced the edge counts but I was not worried about optimizing.

The point of the video was to show that instead of thinking about making a surface and then trying to drill holes in it. Start with the holes and and fill in the gaps!

So I took my time and made a video to try to help someone and what I get in return is criticism?

But then the wheel has less polys than the bolt thats holding it in.

ummm no! As I said I used the default primitives so they are both 20 sided! The point of the video was to demonstrate an alternate way to think about solving the problem of cutting holes and making circular extrusions into a surface other then using booleans. Not how to optimize poly count.

I have no problems using booleans, I use them all the time. I would go so far as to say I probably know more about using booleans and nurbs that anyone in this forum! But I do not believe, for this model, booleans are the right approach.

Also you talk about keeping things quads, but you end up with a 20 sided polygon in the middle circle bit. I don't think its a problem tho.

I have said this many times in this forum and knew someone was still going to comment on the ngons in the cylindrical caps (lol). As long as a surface is planar and will not be deformed it does not matter if it has an ngon with 20 or 2000 sides; It will render just fine!

ngons and low poly myths - YouTube


"If I have seen further it is by standing on the shoulders of giants." Sir Isaac Newton, 1675

Last edited by ctbram; 28-08-2011 at 07:31 PM.
# 26 28-08-2011 , 01:29 PM
ctbram's Avatar
Moderator
Join Date: Jan 2004
Location: Michigan, USA
Posts: 2,998
There 102 polygons and no cylindrical cap ngons. Do I win something? Can you make it with less?

user added image


"If I have seen further it is by standing on the shoulders of giants." Sir Isaac Newton, 1675

Last edited by ctbram; 28-08-2011 at 08:10 PM.
# 27 28-08-2011 , 05:18 PM
honestdom's Avatar
The Nurb Herd
Join Date: Oct 2007
Location: London
Posts: 2,381
wow, didn't think you would be so defensive.

# 28 23-09-2011 , 06:43 AM
ctbram's Avatar
Moderator
Join Date: Jan 2004
Location: Michigan, USA
Posts: 2,998

video on making the swivel part of the caster

I had a little free time tonight so here is a video on modeling the swivel portion of that caster ipatch....

caster - YouTube


"If I have seen further it is by standing on the shoulders of giants." Sir Isaac Newton, 1675
Posting Rules Forum Rules
You may not post new threads | You may not post replies | You may not post attachments | You may not edit your posts | BB code is On | Smilies are On | [IMG] code is On | HTML code is Off

Similar Threads